
Create a slider in your WordPress website:
I have lost the habit of doing slider reviews. But today, I relive my old habits by offering you a review of the Sliding Smart Slider 3 plugin.Not only is it the best complement for the slider, but it is also an example that all other add-ons of the same type should follow. So, let's take a look and judge whether it's worth it or not.


You should know that this is a premium plugin, but a free version is also available, with more options than some premium add-ons.
Its advantages:
- amazing interface
- Free version with many functions
- Easy to use
- Good board to see
Its disadvantages:
- The delete button must be used
- Learning animations takes a little time
In summary :

What is Slider Smart 3?
Smart Slider 3 is an add-on that you can use to create sliders and place them anywhere on your site. You can put everything you want along with its powerful animations, refined between slides (paid version), create layers of animations to move things in the slider.

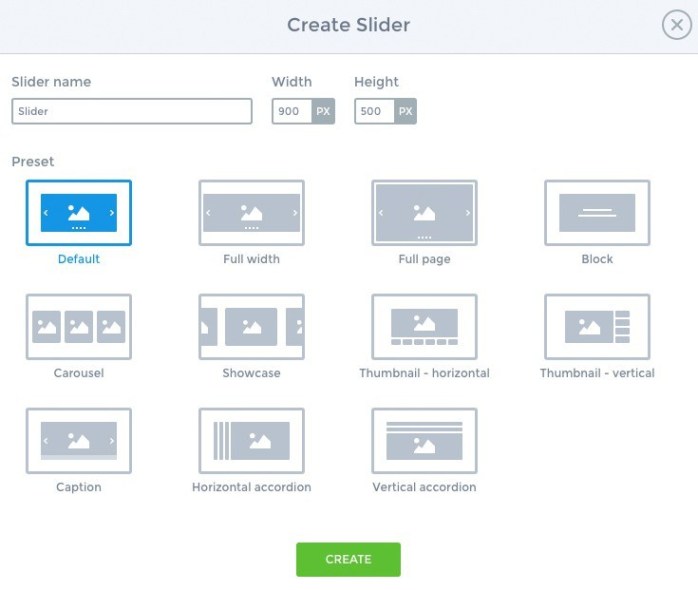
Creating a slider
At the beginning, you will be welcome in your sliders for the useful resources located on the left. You can display your sliders by name or by creation date. You can also choose a lot of small practical actions, but the main action is much larger and more visible with a nice design.
Note that all the action buttons you use to add a slider are green, the secondary side action buttons are blue and the rest of the buttons are gray.

Add a slider
If you have the free version, you will have access to four free sliders. If you have the pro version, you will have access to a library with more than one pre-built 100 slider, which can give you an excellent starting point.

Slider from nowhere
If you want to start a new project, start by selecting a template. The free version offers four models, while the premium version features 11 models.
Once created, you can start by defining general options and adding slides. You probably want to change the general settings first and then adjust it as necessary once you have created some sliders.
The options in the slider
Two sections with tabs give you access to a multitude of options. The first section defines the real parameters, the second section focuses on the visual.
The first section allows you to change general settings, size, auto play, layer animation, optimization and other advanced settings.

The second section allows you to control the user interface elements created by the slider. Arrows, bubbles, automatic game control, thumbnails, shadows and more.

Slide settings
Most of your time will be used in the slide editor to assemble your slide. Although Smart Slider responds, its interface adapts to high resolutions. Your layers will be listed on the left.
Scroll over a layer to see it highlighted in the preview area. Click on a layer to reveal the details in the table below, where you can modify the details of the last one, the animations (premium version) and the layer settings.
You can use the visual editor to change the position of the layer by dragging and dropping. You can achieve the same result using the positioning options in the layer tab. Another small detail: undoing an action with cmd + z works very well.

When you click on an item, it will be added to the list of layers and preview. Start editing immediately and you will see everything in real time in the preview. Each item has many options that you can modify. This is another area where Smart Slider excels. Take a look at the font settings for an article:

Not only can you set colors, line heights, spacing and other elements, you can preview, add an additional CSS and choose from the presets on the right. You can even save your settings as a new preset, which will minimize the time you need to spend on your items.
Above the preview area, you can find the slide settings. A name, description and link, in addition to background, animation and other options.
Animation layers
The pro version gives you advanced animation options to create movement in your layers. The result is best displayed on a home page.

When creating animations, you can define in / out / loop animations and manage events such as clicking, when the mouse enters, when the mouse is turned off and more. You can place your animations on a timeline that supports drag and drop ».
This essentially turns Smart Slider into something similar to a video editor. The process is essentially the same, it places the events on a timeline that tells you when an event starts, the time it takes and when it ends.

Once this is done, each slider can be displayed using a short code, using the Smart Slider icon in the article editor or using the PHP code.
Summary:
Smart Slider represents what all add-ons of the same type have to offer, and what each one should aim for. You can make an opinion by downloading the free version.


1 Comments
Here is the super extra 20x fast server and cheap best and cheapest web hosting service to grow your big and small business on all search engine & get more sales or traffic, 70% blast discount, 24 hour live chat support.
ReplyDelete